Create a ship request
A ship request asks for material to be sent from the warehouse to your place. Any User assigned to a place can create one, and so can Warehouse Managers, Owners, and Admins.
ℹ️ You can only ship items that are currently in the Warehouse (
WAREHOUSE). Warepeak automatically picks the specific units based on the quantity you request — you don’t choose the exact unit.
Before you start
To create a ship request you need at least one assigned place. If your User account has no place assigned, trying to create the request shows “You must be assigned to at least one place to create ship requests” and sends you back to your dashboard without letting you continue. Ask your Warehouse Manager to assign you to a place (see Manage places).
Steps
-
Go to My Requests and click New Ship Request, or open
/app/requests/ship/create/directly. The Request Information form opens.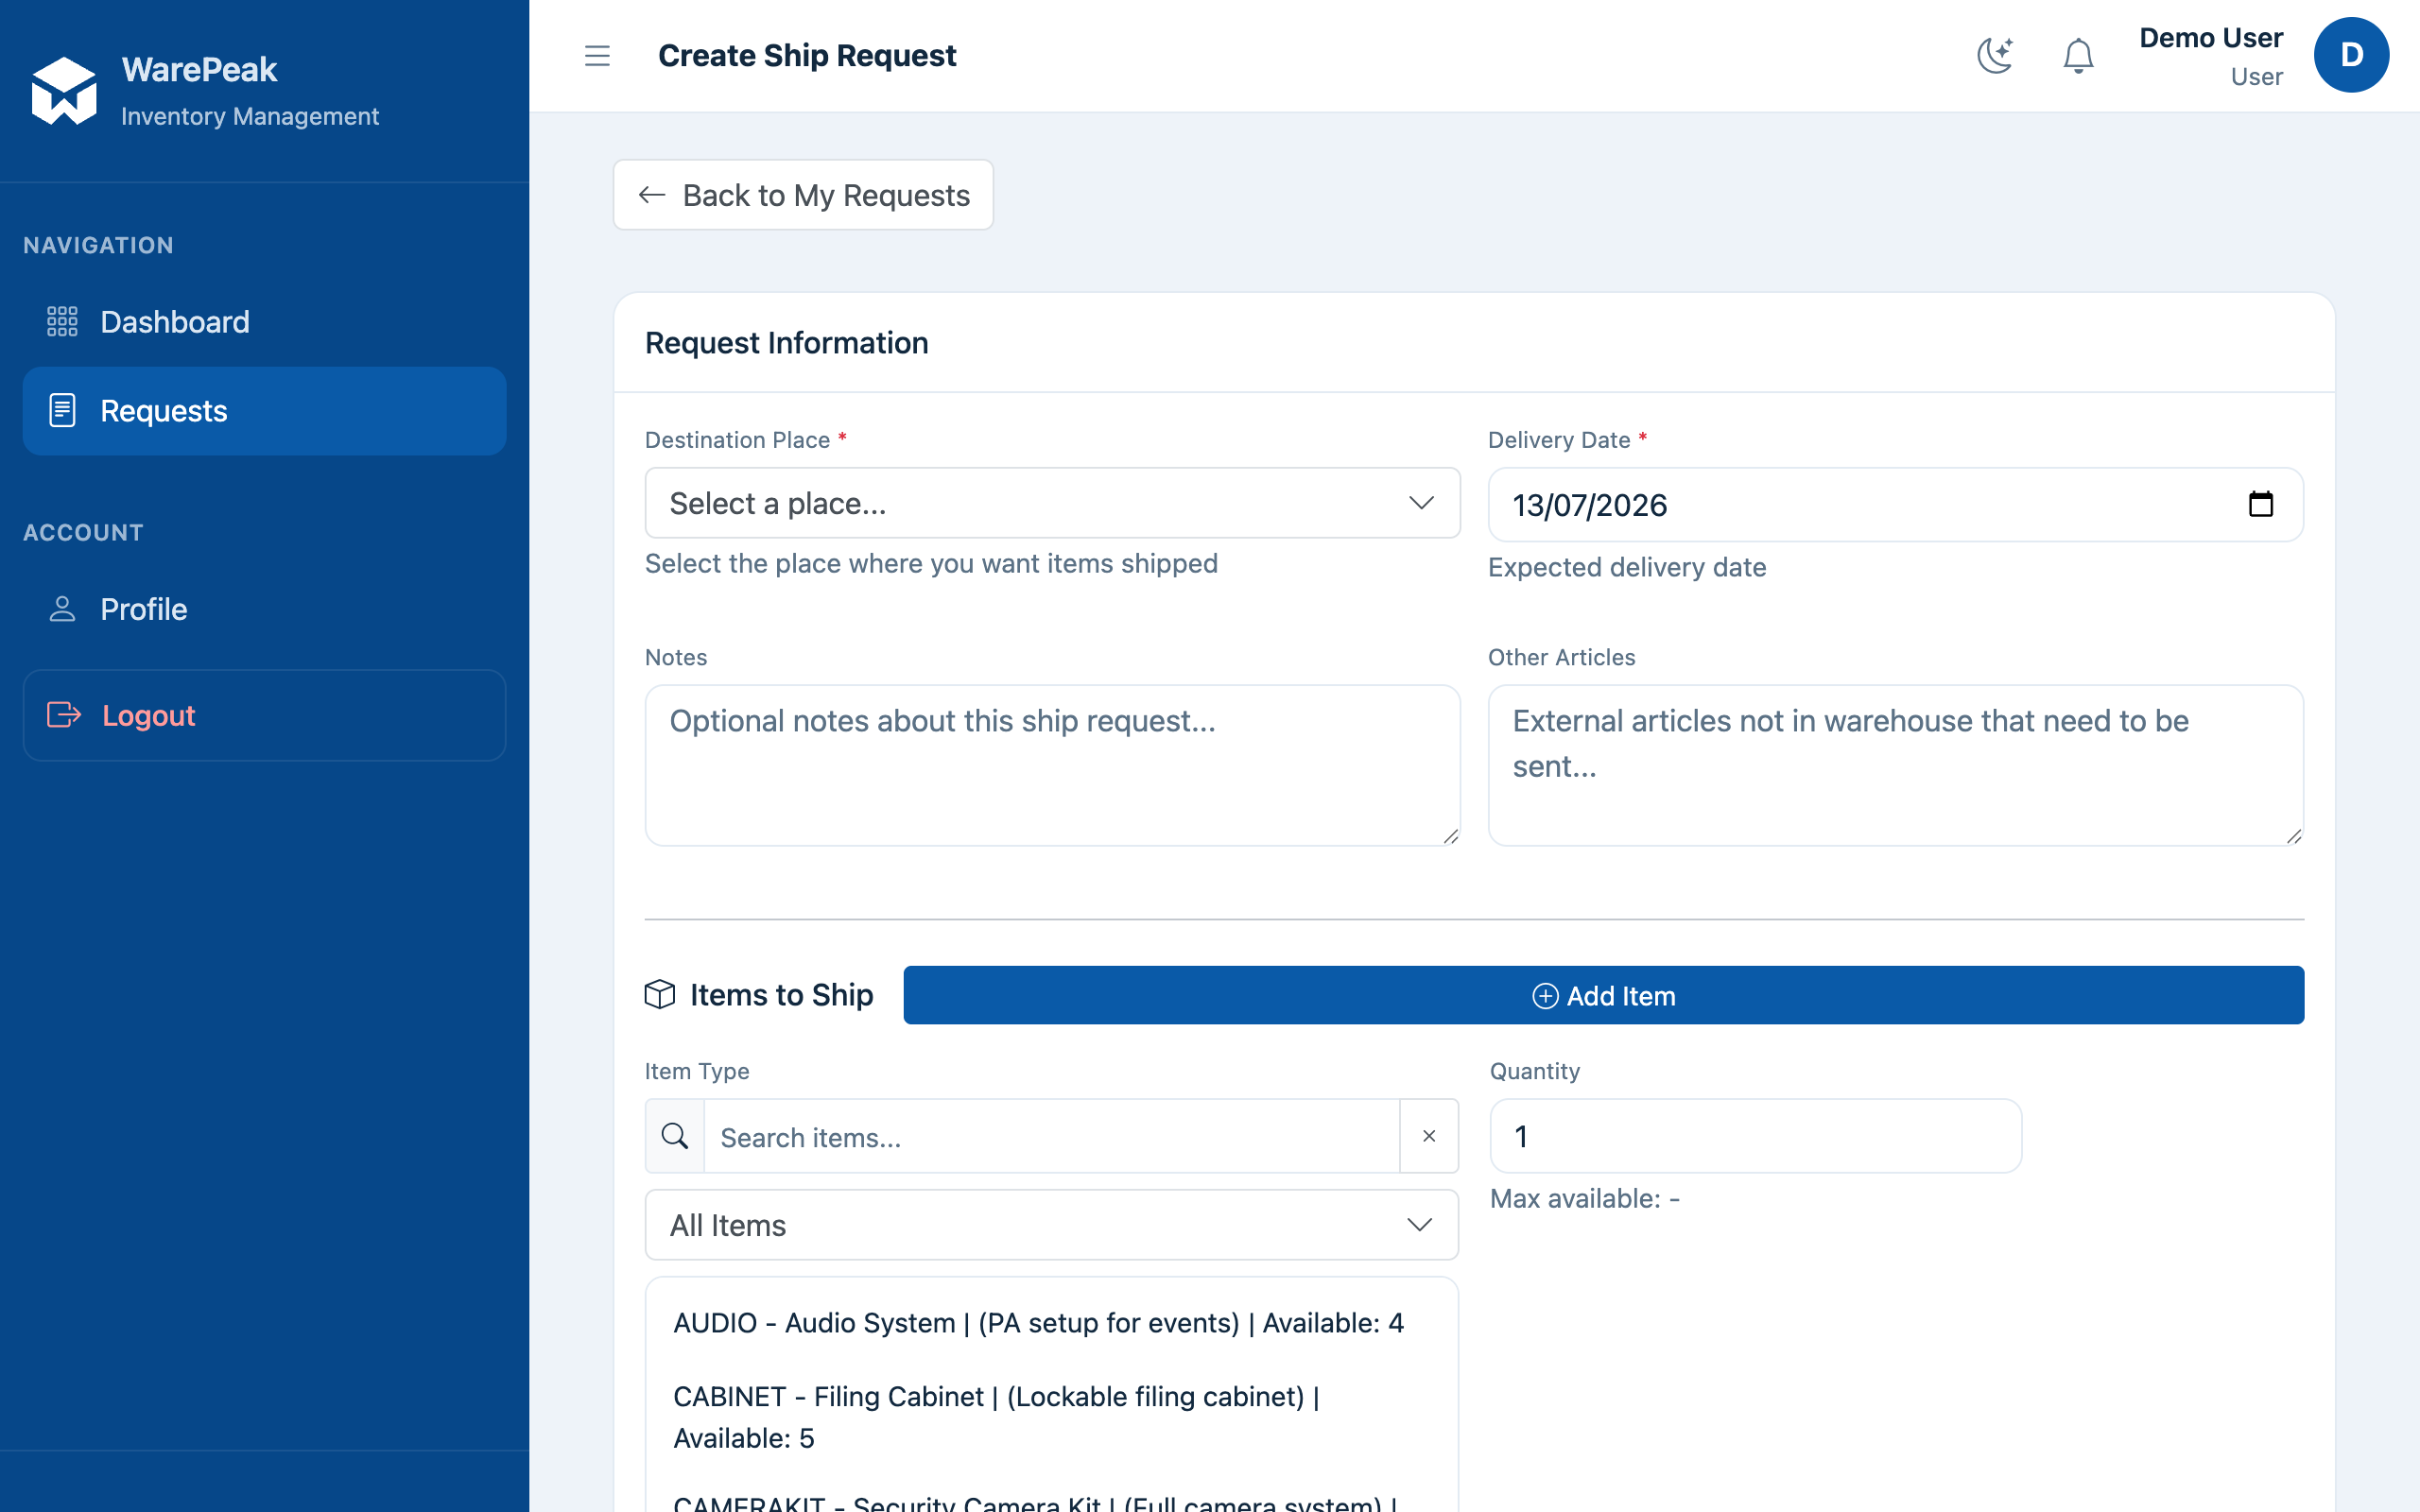
-
Choose the Destination Place. The dropdown only shows the places you’re assigned to (as a User) or every active place in your company (Warehouse Manager, Owner, or Admin). If you arrived via a link for a specific place, it will already be pre-selected.
-
Set the Delivery Date (required). Optionally add Notes and Other Articles (for external material not in the warehouse that you want to request anyway).
-
Add the items to ship, one row at a time:
- In Item Type, type in the search box (“Search items…”) to filter by SKU, name, or description. You can further narrow it down with the All Items / Owned Items / Rented Items filter.
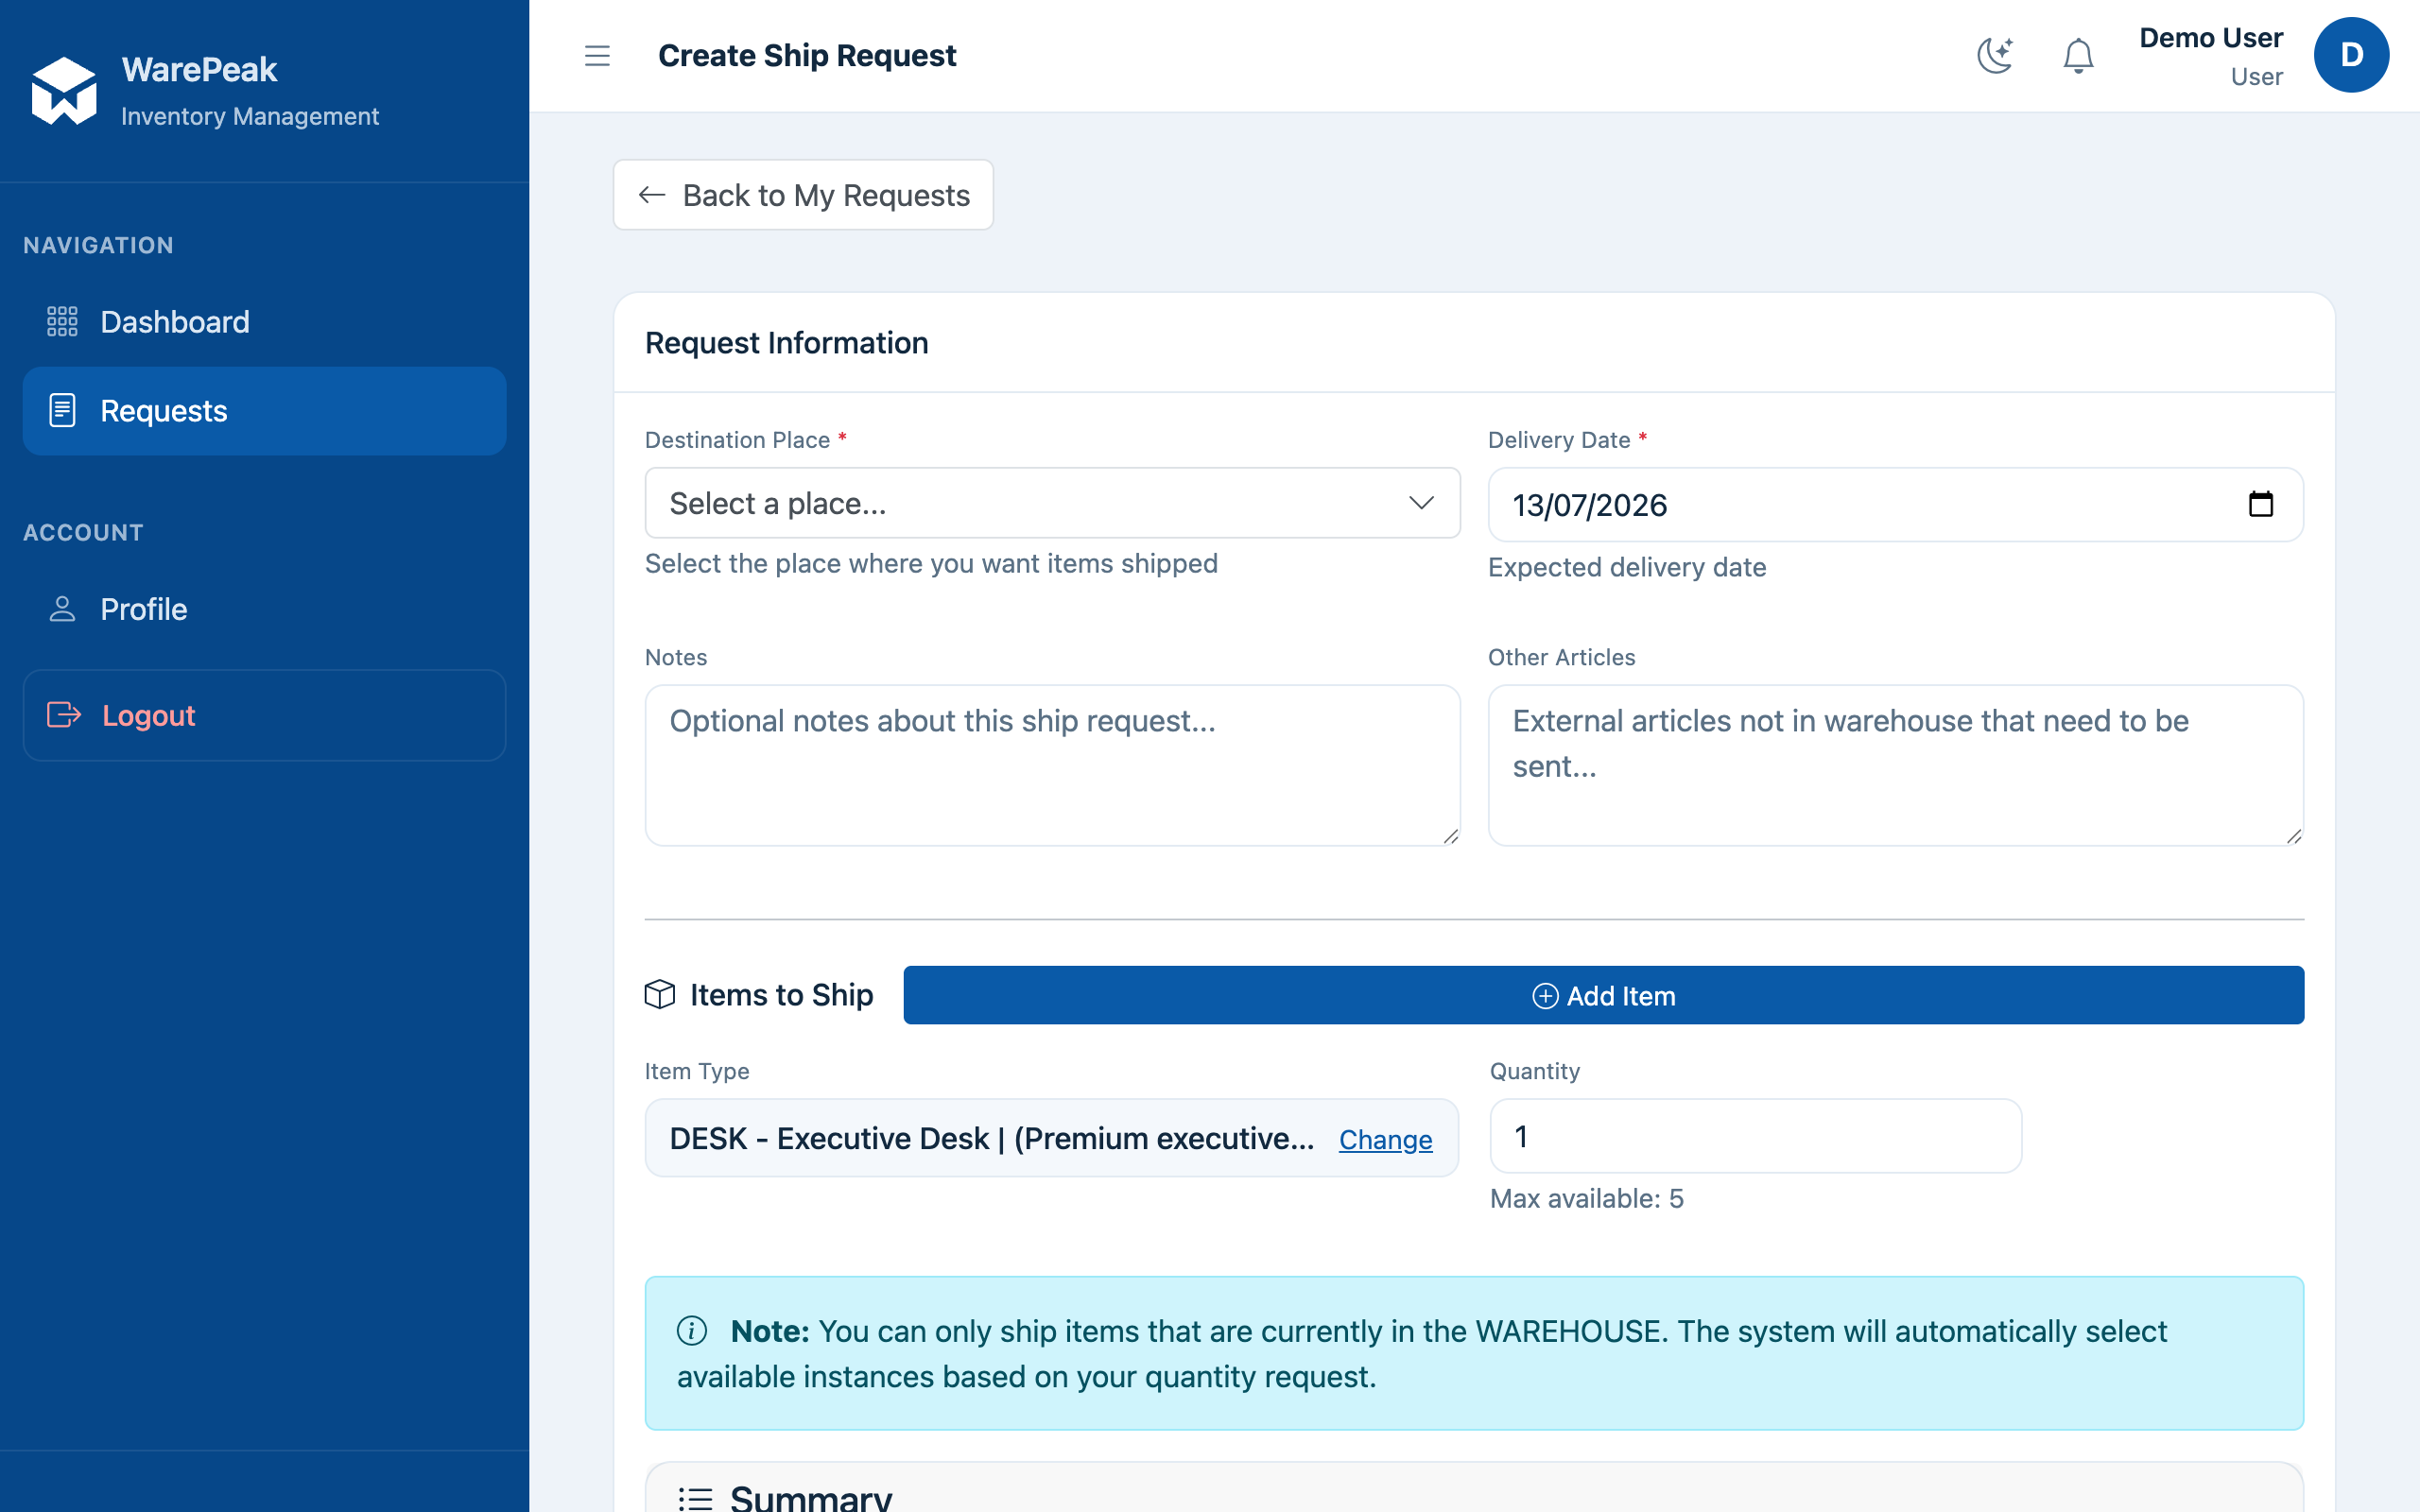
- Click a item type in the list to select it. The row collapses into a compact chip showing the chosen type; click Change to reopen the picker and choose a different one.
- Fill in Quantity. If your company lets Users see availability, you’ll see Max available: N below the field.
- Click Add Item to add another row. To remove a row (other than the first one, if it’s the only row), use that row’s trash icon.
-
Check the Summary panel at the bottom of the form: confirm the place, date, notes, and the list of items with their quantities before submitting.
-
Click Create Ship Request. The request is created with Pending status and Warehouse Managers at your company are automatically notified by email. You’ll land back on your dashboard, and you can see it under My Requests.
⚠️ If you request more of an item than is available in the warehouse, Warepeak shows an insufficient-stock error and discards the whole request (no rows are saved); you’ll need to redo it with a lower quantity.
After you create the request
- While the request is Pending, you can edit or delete it from its detail page (
/app/requests/ship/<id>/edit/). Once a Warehouse Manager approves it (fully or partially) or rejects it, it’s no longer editable. - From the request’s detail page you can export it to Excel or PDF using the corresponding buttons.
- To understand what happens next to your request (full approval, partial approval, or rejection), see Request cycle.
- To understand what it means for an item to be “in the warehouse” versus “at a place” or “rented”, see Inventory model.